Reskinning RedFeather
The default RedFeather template has a very simple but modern style that can be used directly out-of-the-box. This allows less technical individuals to quickly deploy a site without having to worry about writing their own HTML or CSS. The template also gives the user the capability to customise the colour scheme at their own discretion. This can be done purely out of personal colour preferences (if you look fabulous in blue), or to try and match the colour scheme of an existing site. In my earlier post, Deploying RedFeather, I explored how one might integrate RedFeather into an existing site using this method. In this case, I was trying to add a RedFeather repository to the SLEP website, which has a fairly unusual magenta and indigo colour scheme. Simple recolouring RedFeather to match this gave very poor results due to the strange contrast, so I decided to average the colours instead and go with a uniform lilac theme. While this differentiated the site from a default ‘red theme’ RedFeather and would probably be acceptable to some users, I will be the first to admit that this wasn’t even close to a seamless integration.
It was obvious that it would not be possible to fully integrate RedFeather with another site unless you could replace the entire html template and stylesheet. This is a much more complex customisation than simply changing the banner colour and can only be done by writing a custom plugin. However, special consideration were made in the RedFeather core to make writing such a plugin much easier. The first was simple, enforcing a complete separation within the code between the template and content. This meant making sure that html elements making up the vital parts of the site (such as workflow items, or resource preview) were completely independent of the template and render properly even if all other styles are stripped out. Furthermore, they were all given unusual element ids and classnames (prefixed with “rf_”) to minimise the chance that any new css rules on the custom template will interfere with them.
The first step to writing the plugin is to override the ‘render_template’ function and completely replace the output HTML; this will cause RedFeather to render pages exactly like the target site, only without any RedFeather content. Adjusting the new template to include the required content is simply a case of inserting each element in the appropriate place. Each template needs to include the following compulsory elements:
- $BODY – the global variable containing the main content div for RedFeather.
- $TITLE – the title of the page.
- The global CSS and javascript (obtained by calling ‘generate_head_elements’) – should always be present in the html head element.
- The error message list (obtained by calling ‘generate_message_list’).
- The footer toolbar (obtained by calling ‘generate_toolbar_footer’) – contains a link to resource manager and RedFeather project page.
Depending on the structure of the new template, some of the RedFeather content might appear incorrectly. This is probably due to a mismatch in element types (for example, if the template expects <h2> elements instead of the <h1> RedFeather uses), or missing CSS. This is a problem that simply cannot be avoided, since we cannot make assumptions in the RedFeather core about the kind of templates people want to use. However, it is relatively straightforward to use jQuery to transform any incorrect elements so the are consistant with the template.
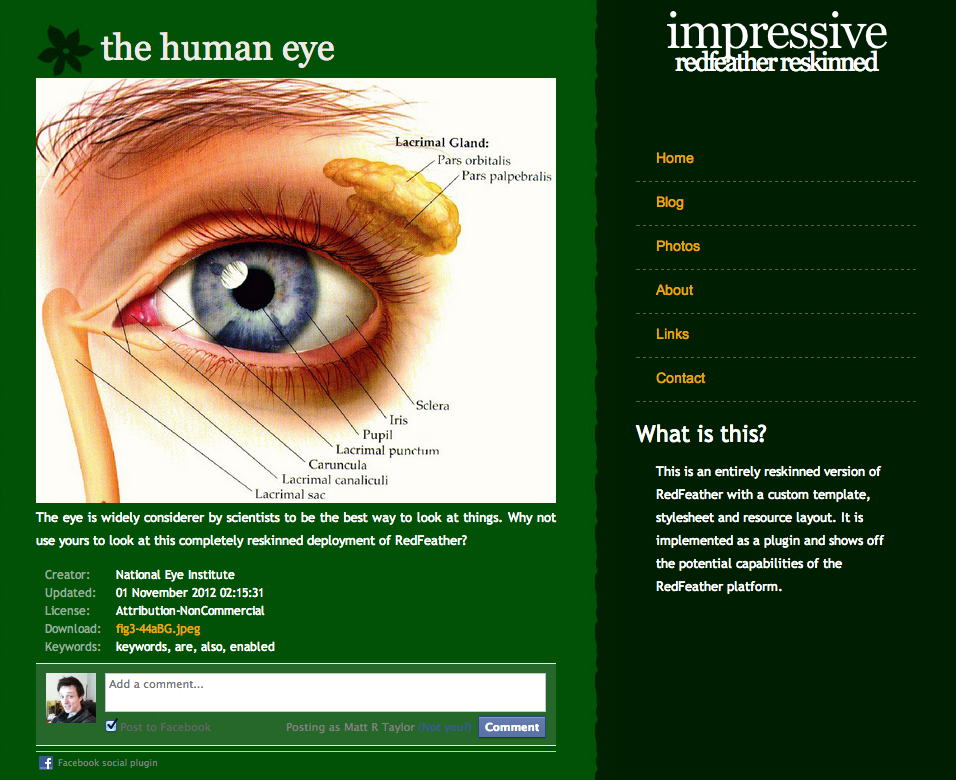
I’ve include a pair of photos below to demonstrate the versatility of the templating system. The first is a resource preview using the default RedFeather template, and the second is complete reskinning of RedFeather using a CC licensed template called “impeccable” by http://www.freecsstemplates.org. This template was chosen because it differs from the default in a number of significant ways with a two-column layout, dark colour scheme, and unusual header style (notice that the resource title includes an image). It also has a very narrow content area, so I’ve decided to install the vertical resource layout plugin, which switches the resource preview, metadata and comment widget into a single column layout.