

BerryClip 6 LED Add-on Board Instructions
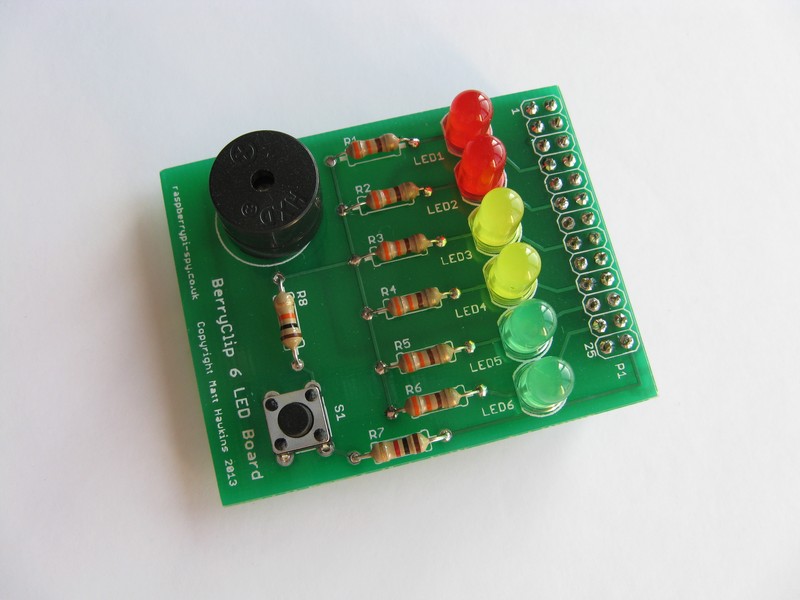
The BerryClip is a simple, cheap and easy to use add-on board for the Raspberry Pi. It plugs directly onto the Pi’s GPIO header and provides 6 coloured LEDs, 1 Buzzer and 1 Switch.
It can be controlled using any programming language that can manipulate the GPIO pins.
Raspberry Pi Setup
Boot the Raspberry Pi and login with default username and password (‘pi’ and ‘raspberry’). You will now be located in the ‘pi’ user home directory (‘/home/pi/’).
Type the following commands in a terminal, pressing the Enter key at the end of each line :
|
1
2
3
4
|
mkdir berryclipcd berryclipwget http://www.raspberrypi-spy.co.uk/berryclip/6_led/install.shsh install.sh |
The above lines perform the following functions :
– Make a new directory called ‘berryclip’
– Move into that directory
– Grab a script from the website
– Run the script
The script will download an instruction file and a set of example Python scripts.
Type :
|
1
|
ls -l |
to list the downloaded files.
Run Some Example Python Scripts
The following example Python scripts are available :
- berryclip_01.py – Test LEDs only
- berryclip_02.py – Test Buzzer only
- berryclip_03.py – Test Switch only
- berryclip_04.py – Test LEDs and Switch
- berryclip_05.py – Test LEDs, Buzzer and Switch
- berryclip_06.py – LED sequence
- berryclip_07.py – Dice Simulator
- berryclip_08.py – Reaction time game
- berryclip_09.py – Random LEDs
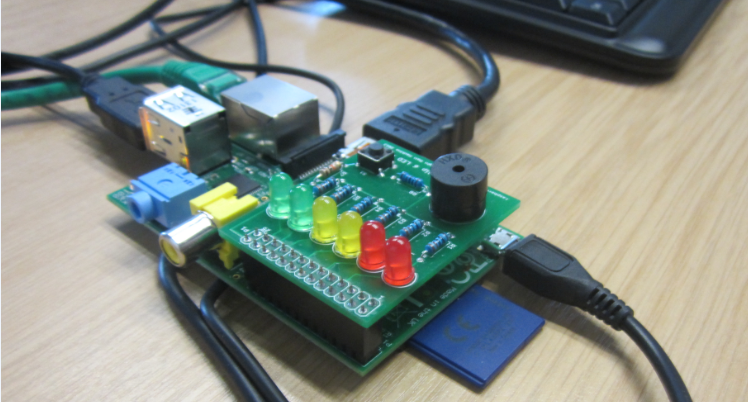
Now plug the BerryClip onto the Raspberry Pi using the 26-pin GPIO header, such that the BerryClip will sit above the Raspberry Pi, as shown below:
To run a script you can use the following command :
|
1
|
sudo python berryclip_01.py |
To quit a running Python script use [CTRL-C].
To view or edit a Python script you can use the command:
|
1
|
nano berryclip_01.py |
Hardware Reference
The following list shows the mapping between the components, the header pins and the GPIO references :
LED 1  - Pin 7  - GPIO4
LED 2  - Pin 11 - GPIO17
LED 3  - Pin 15 - GPIO22
LED 4  - Pin 19 - GPIO10
LED 5  - Pin 21 - GPIO9
LED 6  - Pin 23 - GPIO11
Buzzer - Pin 24 - GPIO8
Switch - Pin 26 - GPIO7
In case the buzzer is continuously biping once you attach the BerryClip onto the Raspberry Pi, it means that the Pi`s GPIO8 was left high from a previous application. In order to manually set it to low, install the wiringPi tool as per https://projects.drogon.net/raspberry-pi/wiringpi/download-and-install/ and then use the command:
gpio mode 10 in
This command will set the GPIO 10 according to the WiringPi (corresponding to GPIO8 on the Raspberry Pi) to low and will stop the annoying sound done by the BerryClip.