
It’s been almost two years since we were asked how to mirror tablets in CLS spaces and until this point it’s been exceptionally difficult. Most devices presume you are on a home wifi network, or at least a corporate network where wireless and wired traffic can see either other.
Things are starting to improve on this front and there there are easy ways to get your content on the screen.
Option 1: Wired
The easiest way to get content on a screen is still with a wire. For Apple devices this is either a VGA adapter (for older CLS spaces) or a HDMI adapter. We recommend the HDMI adapter and using a room with HDMI.
HDMI is a selectable option in the room booking system if you need it.

HDMI is a selectable option when booking room requirements within the timetable system
For Android devices you will need to consult your device manual. Some lower end Android tablets cannot output video at all. Most others use a MHL Micro USB 5 Pin connector (example from Amazon) but some Samsung devices use a MHL Micro USB 11 Pin connector (example from Amazon).
For Windows Tablet devices you most likely need a display port to HDMI adapter or display port to VGA adapter. More information on that is available from Microsoft.
Option 2: Apple TV
This option is only suitable if all the devices you wish to show are Apple iPads or Apple iPhones.
Like the wired option above you will need to be in a CLS room with a HDMI lead. There are a number of other requirements
Please note that some of these requirements are higher than are required for using AirPlay on your home network
- An Apple TV model A1469 (Apple TV 3rd Generation Revision A) not A1427
- An iPad Air (1) or higher or Apple iPhone 5 or higher

Apple TV A1469 works on our network. A1427 does not.
For these devices to talk to each other you also need to have done the following:
- The Apple TV needs to be on the University wired network
- The Apple TV needs to be registered on https://network.soton.ac.uk (you’ll need the MAC address from Settings > General > Network and to reset the device after registering it)
- The Apple TV needs to be updated to at least version 7.2
- The iPad needs to be updated to at least version iOS 8.4
- The iPad needs to be connected to Eduroam
- The iPad needs to have Bluetooth turned on (it doesn’t need to be connected to anything)
Although not required we highly recommend that you…
- Change (in Settings > Airplay) the name of your iPad from Apple TV (to ensure you find your device if other Apple TVs are in the same area)
- Do not change the security settings from showing a PIN before connection
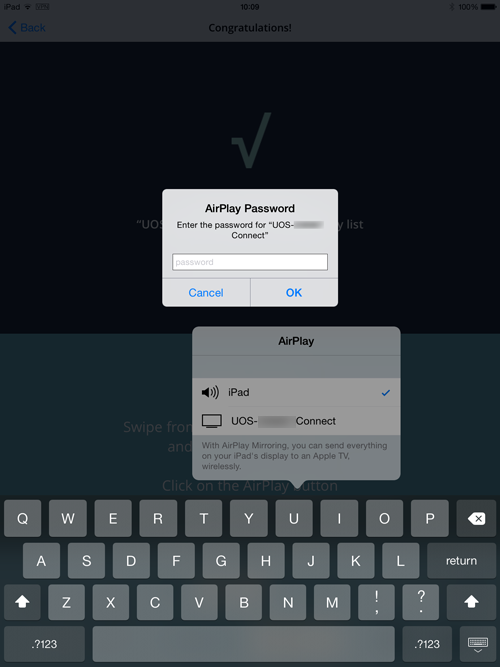
With all these settings done you should be able to swipe up in iOS and select AirPlay when the Apple TV is turned on and idle.
Option 3: Software – AirServer
This option is available to you if you have a laptop and permission to install software on it.
To show content from Apple Devices
These steps only need to be performed once
Install both AirServer and Bonjour for Windows on a computer running Windows 7 or higher.
On your iPad set up the wireless VPN service
- On your iPad navigate to Settings > General > VPN > Add VPN Connection
- Click PPTP
- Description: Wireless VPN
- Server: wireless.vpn.soton.ac.uk
- Account: your username e.g. exa1m14
- Password: your university password
- Click Save
Install AirServer Connect on your iPad from the App Store: https://itunes.apple.com/gb/app/airserver-connect/id967004087?mt=8
These steps need to be performed each time
Connect to the Wireless VPN on your Apple Device from the settings menu

The VPN in the settings menu needs to be on.
Note: If you have more than one VPN on your iOS device, you may need to select it from Settings > General > VPN.
If you didn’t tell AirServer to load each time you start Windows, load it from the start menu.
Right click on the AirServer icon in the system tray and click on “Settings”
Highlighted is the Air server icon. Right clicking it brings up this menu.
The AirServer settings screen will appear. Click on “Show QR Code”
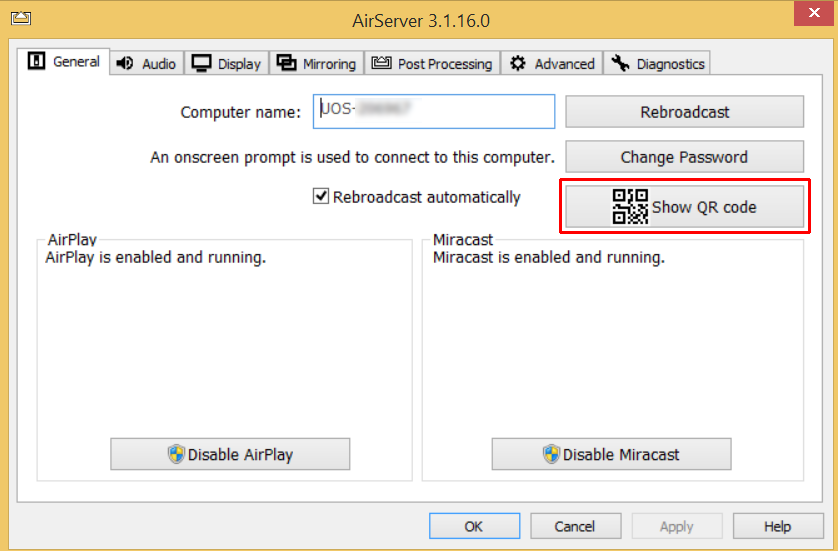
This is the AirServer settings screen. This screen is used to show the QR code needed by AirServer Connect.
The QR code will show. Open AirServer Connect from your iPad

The icon to look for on your iPad.
Click on “Scan QR Code”
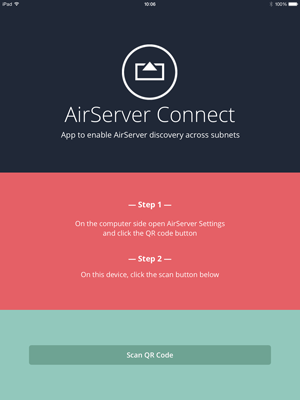
Step 1: Click Scan QR Code
Point the iOS device at the screen and scan the QR code
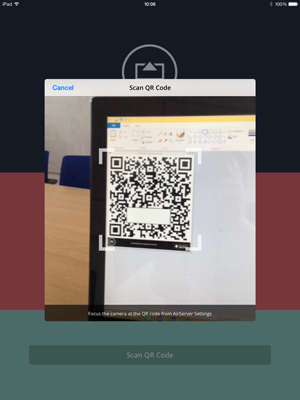
Step 2: Point camera at screen
You should see a success message

The AirServer success screen tells you the next steps to take
Next swipe up from the bottom of the screen to open the Control Center. Select AirPlay and click on the computer name.

You can get to the command center from any screen by swiping up, sometimes you need to do it twice.
Select the computer name. You’ll be shown a PIN on the computer
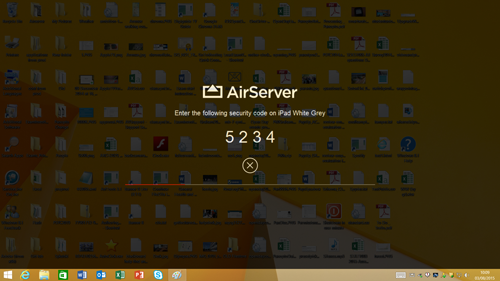
Air Server displays a PIN code for you to enter on your iPad
Enter this onto your iOS device.
Enter the PIN displayed on the computer screen to connect
Finally make sure that “Mirroring” is turned on under the computer name.
To show content from Android and Windows 8.1 (or above) devices
The process of showing Android and Windows content is easier, but requires an extra piece of hardware. You’ll need to insert a Bi-Directional USB Wifi dongle into the computer running AirServer. MLE have tested this £7 adapater from Amazon. The computer running AirServer must be running Windows 8.1 or higher.
You do not need to connect to any Wifi points. Just connect the Wifi dongle into the computer.
You’ll next need to find the Miracast option on your Android device and select your computer
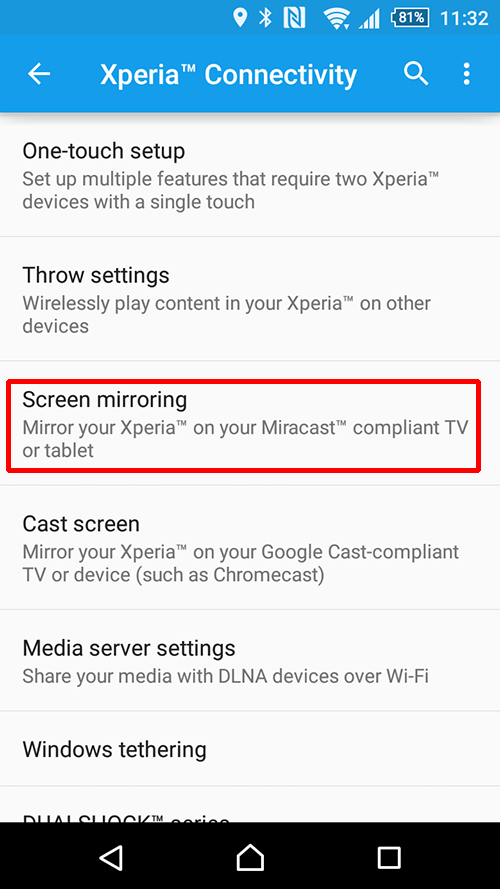
Miracast options differ per Android phone. Here is where they are on an Sony Xpedia phone running Android 5.1
One selected accept the connection on the computer.
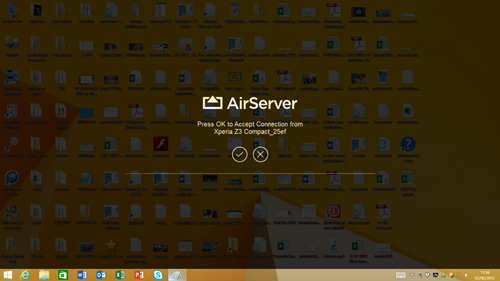
AirServer doesn’t prompt for a pin, but it will ask you to confirm the connection.
Miracast connection quality differs vastly between different devices. You must test your device thoroughly before relying on it for teaching.